Showing posts with label Cricut Projects. Show all posts

Monday, January 10, 2011

I finished my Tim Holtz 12 days of Christmas Tags, FINALLY!


I have been working on these off and on since before Christmas and just finished them today.  I had some of his products, but had to improvise on the ones I didn't.  I used SCALand my Cricut Carts for the majority of it.  I explained further under each picture.  Hope you like them.

I started cutting the tags in manilla cardstock on my cricut using TBBM and the hide contour on my Gypsy to get rid of the hole in the tag.  But eventually purchased the Tim Holtz die to cut the rest of the tags out.  So even though they are the same height, they are not the same shape.  On the tag above, I did not have the bird die from TH, so I used the bird off of Gypsy Wanderings and cut out of grunge paper.  I also did not have any of his tissue paper tape, so I cut regular tissue paper into strips, stamped an image on them and grunged them up a bit using Vintage Photo distress ink.   I used this under the rosette above.  I did not have his tree stamp, so I just used another branch stamp that I had for under the bird.


I used Christmas Cards cartridge to cut the mask for the horse and sleigh and followed his directions for the masking technique.  I didn't have the house die, so I welded houses on my gypsy from the Christmas cartridge and made them about 1.5" tall and cut them out of grunge paper, then I followed his steps for decorating the houses.  I did end up purchasing the corner metal pieces because I could not find a suitable likeness in anything I had.  I didn't have a lot of Tim Holtz bling so I created my own.  I got some findings from Hobby Lobby that were perfect for die cutting small shapes and putting the shapes in these findings and with Glossy Accents made a glossy dome over the die cut.  The findings are in the jewelry isle and are from The Jewelry Shop. I also purchased some beads, 26 gauge wire, jump rings, etc and made my own baubles. All I needed was a pair of jewelry cutters and needle nose pliers to make these, plus I could make more sets then what it costs to purchase them already made.

Purchased

Handmade 


This tag is one of my favorites because of the color.  I used the Seasonal paper from TH Idea-ology collection, that my Micheals now has on the shelf. Surprise, Surprise. Also used handmade bling.


 I didn't have any of the dies I needed for this tag, so I used SCAL and printed the images out that I wanted, traced them, colored them black with a sharpie and scanned them into my computer.  Opened them in SCAL and was able to create a scut file from them.  I cut them on grungepaper and then follow his directions for distressing them.  The ticket was cut from one of the carts I had, but I can't remember which one.  It worked perfect cut out of Kraft paper.  The tissue along the bottom was made using the directions above.


I created the green label using my gypsy and some shapes that I welded together off of carts because I did not have this die from his collection. I cut it from grunge paper.  The 25 was cut from Blackletter or another cart from grunge paper and distressed.  The santa stamp was one I had laying around.


This tag has homemade bling on it and the bird was cut from Gypsy Wanderings, grunge paper and distressed using his rusty distress technique.


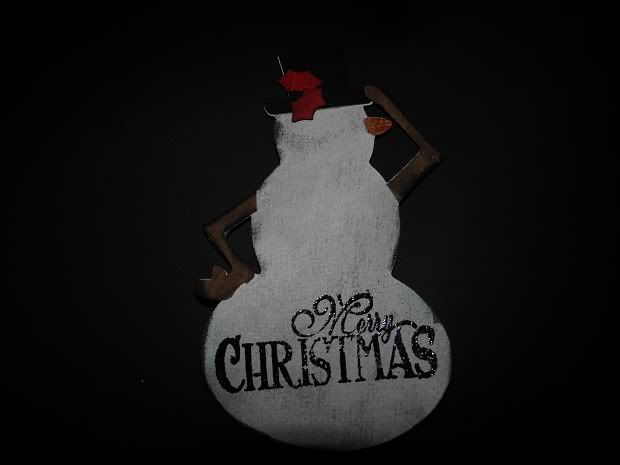
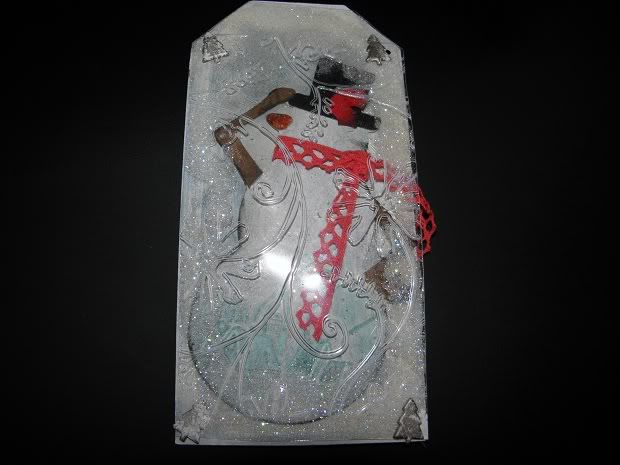
Snowman was created using George and a couple other carts and the cut file can be gotten under my cut file tab above.(Enjoy) 

Joyful and the swirls was cut using my cricut carts, the poinsettia was made using his flower dies, following his directions on his blog.


The House and the tree were cut from the cricut carts, along with the ticket.


Rosette was cut using a cut file I made under the file tab above.  Peace on earth was cut from Blackletter on grunge paper.

Tree was cut using SCAL.   I took dictionary paper and stamped a stamp on it using versa mark and embossing in clear embossing power.  I inked the rest of the tag, but where I had stamped and embossed, it resisted the ink.  I really like this technique and I am planning on using a lot in the future.


The Ornament and Joy was cut using scal.

To see the original Tim Holtz 12 days of Christmas tags click HERE.  I hope I have inspired you to try these even if you don't have all of his product.

Beth


Thursday, January 6, 2011

Weekly Circle Blog Challenge


Hi everyone, I made this for the Weekly Circle Blog Challenge.  It came together very quick, and I needed to get it posted for the challenge tonight.  Sorry the pics are so dark, It was late and I couldn't find my picture light.  It does use the milk carton Gypsy file that you can get under my cut file tab above.

Here are the rules of the challenge:

Weekly Challenge #14: Getting In Shape!


According to polls, “getting in shape” is among the Top Ten Resolutions people make each New Year’s Eve. Let’s do it! Let’s start the New Year off right by getting in shape . . . a shape other than a rectangle. We challenge you to create a project in a shape other than a square or rectangle. Your project must also include a number somewhere and bling of some kind (to go along with this week’s theme of “Blinging in the New Year”!
Project must be newly created for this challenge and must include atleast 2 different cuts from any Cricut cartridge to qualify.

The numbers are one the tissue paper that I stamped with a ruler stamp on the front door in case you can't see them.


Beth

Sunday, January 2, 2011

My Pink Stamper Design Team Challenge


Hi everyone, I hope everyone had a great New Years.  It's almost time for me to go back to work after 13 days off in a row.  It was awesome.  After getting back from West Virginia, I got to scrap/craft everyday.  They had to pry me out of my craft room.  I was surfing the craft/cricut sites yesterday and I saw that My Pink Stamper was having a design team challenge for 2 openings in her Design team.  I discovered Robyn about a year ago on the Message Board for Provocraft and have been checking in on her from time to time.  She does a lot of fun give aways and Hosts live Web shows, and has an awesome blog with lots of followers.  Anyway, I thought I would throw my name in to the fray for the challenge.  I saw this gable box while looking thru the Paper Crafts magazine the other day and didn't think that any of my carts had anything similar on them, so once again I created my own using George, TBBM, and my Gypsy.  I used the rectangle and a circle off of George, and some tags from TBBM.  I sized them, welded  them and created the box that is approx 8" tall x 4" wide x 2" deep.  I cut it on my cricut and then turned the blade over and scored it using the 2nd tab I created with just the rectangles, so all I had to do was glue and fold on the score marks.  After the box was complete, I cut 1 piece of brown cardstock 3 and 5/8's x 5 1/2 for the front of the box, 1 piece of cream cardstock 4 and 7/8 x 3 1/4 inked the edges and adhered to the 1st piece of cardstock.  I then cut 1 piece of pink cardstock 2 3/4 x 4 1/2 and layered with a piece of cream cardstock that I cut 2 1/2 x4 1/8, ran thru my embosser using Cuttlebug dot embossing folder.  I inked the edges and then sewed a zig zag stitch around the whole thing.  I tied a Green ribbon around this package, and adhered to the cream and brown cardstock.  I stamped the flower image on a piece of cream cardstock using the watercolor technique, trimmed, inked and adhered to the front of the Cuttlebugged(is this a word?) cream cardstock with pop dots.  Finally I cut 4 butterflies at 1" tall using EveryDayPaper Doll.  I hid contour on 2 of them and cut the other 2 as is.  I layered these together, added pink pearls and glued to the front.  I stamped the word Sweet on a tag I cut with Gypsy Wanderings at 2" long, inked the edges and glue under the ribbon.  Here are addl pics of the project. 


The rules for the Challenge are below:
You will need to have a blog
*You cannot already be serving on a DT that has product that is a conflict of interest (most DTs are just fine as long as they do not sell product that is similar to My Pink Stamper Original Cricut Stamps idea)
*Your project must be made just for this challenge
*Post a pic on your blog with a full recipe along with what the challenge is about
*This needs to be a new project that you make just for this challenge
*Only one entry per person, please
*You must have either a Cricut or Imagine to serve on the team
*No experience necessary but you must have a love for the craft! :)
Challenge: Make a card, scrapbook page, or other Cricut project with your favorite cartridge using my favorite colors......
Pink
Green
Brown
(other optional color of your choice).
 
If you get a chance hop on over to Robyn's blog and check it out!
 
Hope you enjoyed my project today,  I liked how it turned out.  I will see you later,
 
Beth.

Saturday, December 11, 2010

Tag nothin but the Cricut and Gypsy


I love the Tim Holtz 12 days of Christmas tags he has on his blog.  I particularly like the snowman tag, but did not have the die, and could not get it locally so I made my own with my Gypsy, TBBM and George. I really like how it turned out.  I used grunge paper and tried to follow his directions.  I actually finished a tag.
You can get the cut file by clicking here.  And don't forget to leave some love.  Thanks so much for visiting me today..  Beth.