Showing posts with label Challenges. Show all posts

Tuesday, January 3, 2012

You can almost hear the Wurlitzer Playing.


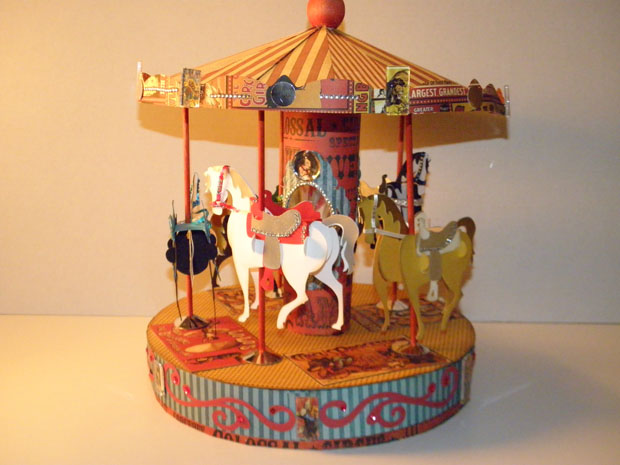
I had 2 titles for this post.  The first one is above, the second one is "Really, what was I thinking?".  Hi everybody, today I want to share with you a project I made for the Circle Blog Magazine Challenge.  You needed to use the new Cricut Craft Room for your project.  I tried using it with my Imagine, but didn't have much luck.  It kept freezing on me, so I gave up, and connected it wirelessly to me Expression 2, and had much better luck.  In fact is was really easy.

I love Carousels, probably because all of the beautiful horses on them in various state of tossing their heads , they seem so wild and untamed.  Actually every chance I get, I ride the Carousel.  Silly I know, but it's one of my guilty pleasures.  I am probably the only woman in my 40's that still rides them.  It has to be a really cool one though before I will ride.  The smaller ones with lame horses on them just don't do it for me.  My husband just rolls his eyes, but my daughter will always ride.  I wonder how old she will be when it's just not cool anymore.  Hopefully, never.

Anyway.  I have always wanted to make a Carousel out of paper.  When I saw Noah's ABC Animals, I knew it would be perfect.

I started with George and welded a Triangle with a rectangle on both sides for tabs.  I cut 15 of these at 6.014".  I glued them all together to create the roof of the Carousel.  I then measured the roof on the underside across the bottom and cut the largest circle I could on my E2 which was 11.25".  I glued this to the underside of the roof.

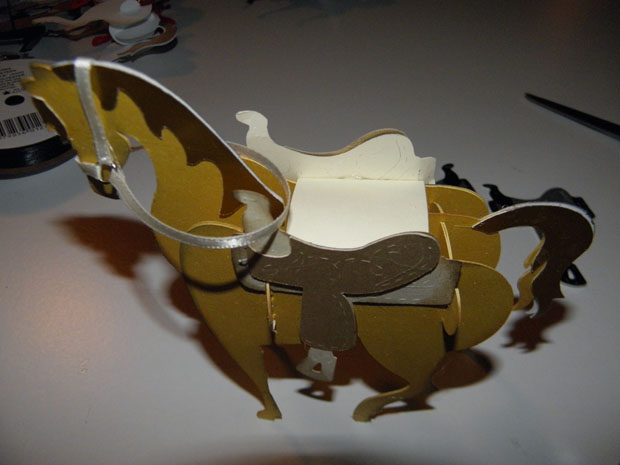
Next, I cut out the horses.  I used the 3-D horse on Noah's Abc's.  I cut 5 at 5", each one from different colored cardstock.  I wanted a palomino, black, bay, white and of course pinto.  Below are the photo's of how I made the saddles.  I used Old West for the Western Saddles, and a scrap of matching cardstock for the seat.


When these were all done.  I added bridles out of ribbon and jump rings, and bling.  Several of the horses have breast collars.  Here they are all blinged out.


The pic above shows the "Mirrors" on the center pole.  I researched pics of Carousels on line, and all most all of them had Mirrors all over the place.  I put 2 on the Centerpole.  I used Fancy Frames and George.


The Centerpole is just rolled up cardsock.,  I needed to make the base out of something sturdy, so I cut another circle out of thin cardstock and traced on heavy chipboard and cut out with my scissors.


There is a piece under the horses hoofs, and at the very bottom of the carousel.  The one on the bottom is .25" smaller then the top.  I will tell you the reason later. 

Here is a close up of the roof. 

This pic shows where I covered the wooden dowel rods with "silver pieces" 

I did the same with the top of the Carousel.


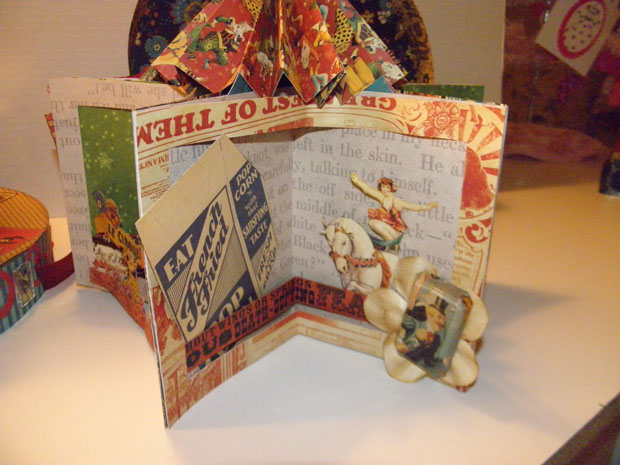
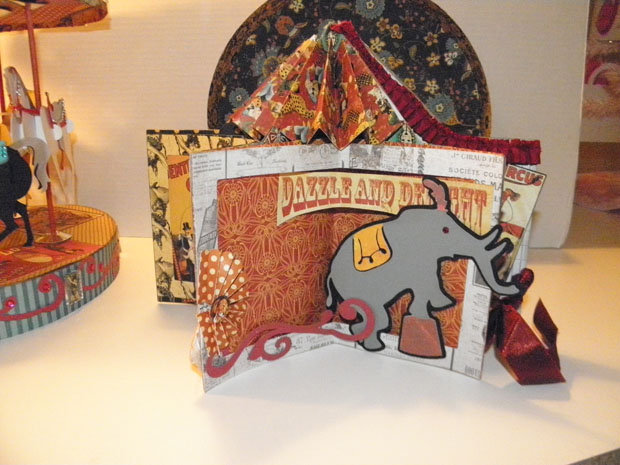
The reason I wanted the bottom slightly smaller than the top, is because I wanted to hide a mini album in the base.

I have made these star albums before(see this post Star Album), but I googled Carousel Mini, and found a really cool blog where this person added a top to her star album.  I didn't use her pdf file, but just eyeballed it and created the album with my cricut using my dimensions.  Her blog is Andthereweretwobears.


Well I hope you like my project.  I really do.  So what should the post be titled?  Can you hear the Wurlitzer, or What was I thinking?

Friday, November 25, 2011

Autumn Picture Frame using Autumn Embossing Folder and Cricut and Giveaway.


Hi everyone, I made this project for the Monthly Cricut Circle challenge project going on on the Cricut Circle Blog.  The project needs to have a Fall Theme and texture and cricut cuts..  I started with Aluminum Duct tape which my husband had squirreled away in his never ending stash, ran it thru my cuttlebug, and applied to a wooden cheapie picture frame I got from Michaels.  After it was applied to the frame(the duct tape has adhesive on the back.)  I used alcohol inks and created the colors on the tape.  I then cut out some leaves from one of my carts along with their shadows and attached with some ribbon and hot glue.  Unfortunately, I accidently broke the glass in the frame, so until I get more glass, I can't put in pics in it.  I hope you like the project.

My husband gave me his roll of tape, so if you leave a message on this post with a way to contact you by this coming Sunday night at 9pm est, I will have a drawing and GIVE AWAY to 2 people, 2 yards of this duct tape. You can also get it online, or at the hardware store.  So leave a message if you want the tape. 

Friday, October 14, 2011

Final Project for the Blogiversary Challenge


This is my last post for the projects for the blogiversary challenge going on on the Cricut Circle Blog.  The challenge is monochromatic.  I used Bags Tags and Boxes, CTMHAP and a cricut cake cart for the snowflakes.  The bag is cut to 6.5 tall, which takes up a whole 12x12 mat wide.  I stamped the reindeer on CS and cut him out.  Everything is pop dotted to the bag.

Thanks for riding along with me this week during the Cricut Circle Blogiversary, I had fun.

Beth

Thursday, October 13, 2011

Card for Blogiversary Cuttlebug Challenge

Hi Everyone, this is my 2nd to the last challenge project for the Blogiversary Challange.  I am not sure I liked the way this one turned out.  The challenge was to use your cuttlebug and at least 2 cricut cuts.  I used CTMHAP for the cart(Love it), and 2 different cuttlebug folders. The Card is a trifold cut at 5.5 inches tall and 12" wide, and scored at 2,4,8,and 10" inches and then folded.

Thanks for Visiting me today.  Beth

Tuesday, October 11, 2011

"Spooky" Card

Here is another card I made for the Blogiversary Challenge going on at the Cricut Circle Blog.  For this challenge, you need to use the above sketch, and it can be any project.  Card, Layout, Home Decor.  I choose a card.   I used my Imagine and Enjoy the Seasons to print the house and it's layers at 4".  I used Happy Hauntings and my Imagine to print Spooky at 1.5".  I flood filled the layers. After I got it on the card, because the cut is so small, it looks like SPANKY, not Spooky, oh well, maybe I will give this card to my husband too.  And finally,  I used the circle already installed on the Imagine for the moon and flood filled it in yellow.  It's cut at 2".  I am really, really starting to like my Imagine.  I am using if for almost every project now.


The Bats and Canvas strip are from the Hocus Pocus collection from Pink Paislee.

Every year Pink Paislee has an annual warehouse sale, and for a set amount of money, they send you a whole box full of stuff.  This is the first year I tried it and I was not disappointed.  I will probably order it again next year, I just hope they send me an email so I don't forget.

Thanks for stopping by today, Beth.

Monday, October 10, 2011

I only have Eye for you!


Here is a card I made to give to my husband,  I think he may get a small chuckle out of it.  He is pretty serious most of the time.  I used Mini Monsters.  I am going to enter it in the Blogiversary challenge going on on the Circle Blog.  You need to use 2 cricut cuts, a title, and at least 3 buttons.  Hope you like it, and thanks for visiting today!

Beth.

Sunday, October 9, 2011

Layout using my Imagine and Enjoy the Seasons

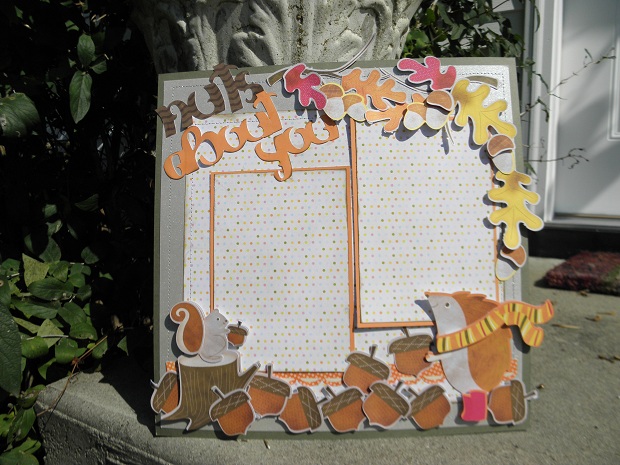
I got the Enjoy the Seasons Imagine cart off of Ebay the other day, and I am really liking it.  It has so many cute cuts on it.  Here is a layout I made for the Blogiversary going on at the Circle Blog.


Thanks for stopping by today,  Beth

Saturday, October 8, 2011

Every Birdie Welcome


For the Cricut Circle blog monthly challange, you have to use Echo Park paper and 4 cuts from you favorite cartridge.  I used Sophie, and Sophisticated, and Echo Park A Walk In the Park page kit to created this bird house.  I started with a wooden bird house from Hobby Lobby and covered it with Echo Park paper.  The fence, bird, butterfly, flower, and banner was cut on my Imagine.  I made the roof by cutting strips of cardstock and folding them over to create a tear shape and then gluing them to the roof with hot glue.


Thanks for stopping by today, Beth.