
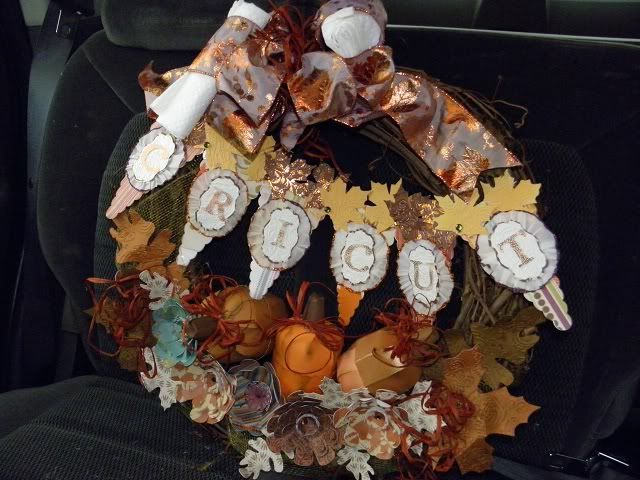
Hi everyone, today I am a guest designer on shesasassylady I wanted to show you my entry for the new HSN Banner Contest that Provocraft had for another launch of the E2 Last Monday 9-26. You need to make a banner that spells CRICUT. I made 2 banners and this is the second one. I started with my Imagine and using a fall paperstack I got last year, and flower shoppe cricut cart, I cut 5 sets of flowers that were 3 inches for the bottom layer and then all the corresponding layers. I layered them and set them aside.

I then took Straight from the Nest and did Layer Shadow on the Leaves, sized them to 5.15 real dial size and cut 4, I ran them thru my Sizzix with a Tim Holtz embossing folder. I set these aside. I used the same cut and cut out of cream and gold cardstock smaller leaves. I cut a whole 12x12 page of these and set them
aside.
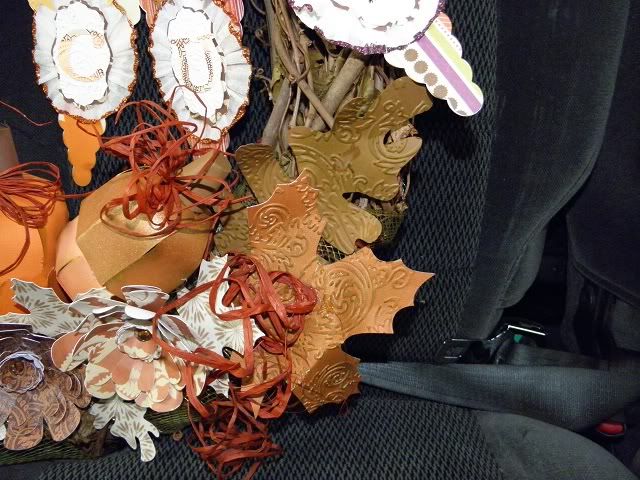
I used Country Life to create the Banner Base, Glittered the edges of white crepe paper and pleated them into Rosettes using a needle and thread. Using CTMH Art Philosophy I cut 6 labels sized to 2.67 wide x 1.66. I ran these thru my Sizzix. I cut the words Cricut out of shimmer cardstock from the same stack using CTMH Art Philosophy. I attached all this to each banner. I strung the banner on thin ribbon and then cut addnl leaves that I ran thru my Sizzix to the top of the banner using hot glue. I set this aside.

Using Sweet tooth Boxes, I cut the ice cream cone in 3 different sizes and put them together to look like pumpkins. I took the cone part of the ice cream cone and sized it much smaller then the scoop cuts, I assembled it and used as the stems on the pumpkins. After the "pumpkins" were assembled. I inked all of the sticky out edges. When the pumpkins were all done, I tied raffia in bows and glued to each stem. I set these aside.

After I had all the pieces cut, it was time to assemble my wreath. I took ribbon and made the bow at the top. Wired and hot glued it to the wreath. Then the pumpkins were glued to the bottom to resemble a pumpkin patch. I started adding flowers and the small leaves to cover the gaps the pumpkins made. I attached 2 of the larger leaves to each side of the pumpkin/flower patch. I finally added the banner last. I felt it was missing something at this point, so I gathered more rafia and glued in bunches at each end of the "patch".

I hope you like my entry. Please disregard the paper towel that is stuck in the bow, I took the pics of the wreath in the car on the way to the post office. I did not want the bow to get crushed on the way to Utah.
I was please how it turned out, and would like to have kept if for my house. Thanks Sheila for having me as a guest designer today. Until next time, Beth.


1 comment:
Beth this banner is just gorgeous! I love it and want to congratulate you for winning the banner contest at HSN!!! Your banner was awesome. Thanks for sharing this with us today at She's A Sassy Lady!
Post a Comment