Showing posts with label Imagine. Show all posts

Wednesday, December 21, 2011

Ornament for the Circle Weekly Challenge. Printing Fabric on my Imagine.

Only 3 more days until Christmas.  I can't believe it's almost here.  It's my favorite time of year.  I love all the crafting and baking surrounding it.  Anyway, I want to share my project I made for the Weekly Challenge.  I started out by Ironing Heat and Bond to the back of a 12x12 piece of fabric.  I used canvas, but after the Imagine only cut once, I had to go over it with my scissors.  If I would have used plain white cotton fabric, it would have cut it out completely.  Plus I don't think I had my blade set right.  Anyway I used the mittens off of Snow Angel and printed and cut them on the fabric, then I removed the paper back from the heat and bond.  I used silver thread to sew together the edges.  To dress it up, I cut the poinsettia off of Winter Woodland 2x along with the leave layer.  I cut those at 1.5".  Layered them with pop dots, and ribbon and attached to the mitten.  Iadded a ribbon hanger with hot glue, and glued on the bells.  I then stuffed with tissue paper to add fullness and tucked in some peppermint stick.  Hope you like it, Beth.


Wednesday, August 24, 2011

Spa Birthday Invites

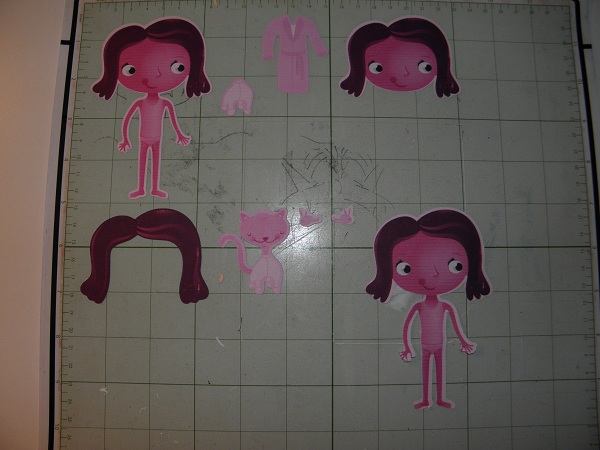
Hi everyone, today I am a guest designer on Shesasassylady.  My daughter's birthday is in a few weeks and she wants to have a slumber/spa/birthday party for her celebration.  She doesn't want much does she?  Anyway I saw these invites in the front of the cartridge handbook for the Imagine cartridge Best Friend's a couple of month's ago and wanted to make them for her party.  I started with the Best Friend's cart and selected the girl with the robe and all the layers and cut her at 4.5 inches.

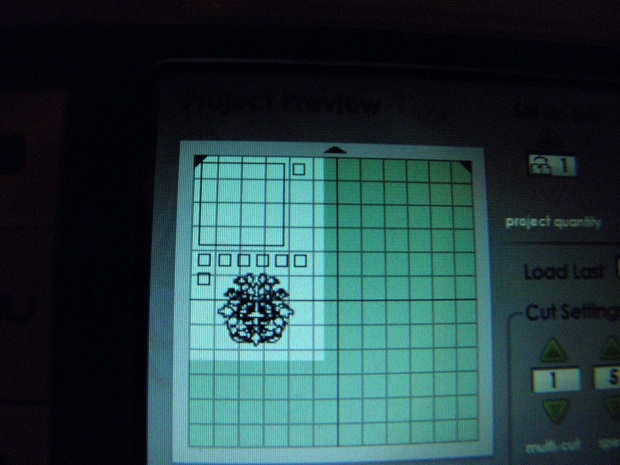
I needed to make six invites so I selected project quantity of 6 on the Imagine screen and it tells you how many times you need to load the mat for that quantity.

I then printed 2 of the pattern papers that are included with this cart.  I cut a piece of black cardstock 4"x9.5", I cut the striped paper 3.75"x9.25", and the green paper 3.5"x9".  The Girl and her layers are 4.5" which includes the cat in the robe.

I cut the Slumber Party sign at 2", because I made my actual invite in Word with that amount of space between you're invited and the details.

Here are all the pieced to the invite.


Here is the invite assembled.


I thought I would make the soda bottle accessories like is shown in the front of the Cartridge handbook, and my daughter is giving away gift bags to all the attendees and I thought the premade scrapbook page that comes in the cart that you can print would be cute on the front of the bags.  I could add pics of each guest for a keepsake.


Until next time, Beth.

Wednesday, June 22, 2011

Printing note cards with your Cricut Imagine.

Hi everyone, today I am a guest designer on Shesasassylady.blogspot.com.  I wanted to show you how to print easy note cards with your imagine.  Now printing in a certain spot on a piece of paper on the imagine is not my idea, I originally saw the idea from LindaK on the Provocraft Message board from paperboutique.blogspot.com, she printed sentiments inside her cards.   I wanted to use this technique to print my own notecards.  Once I started, I saw that the possibilites are as endless as the carts you own.  I used Damask Decor for the design, and All wrapped up for the color, but you can use the standard colors the Imagine comes with.

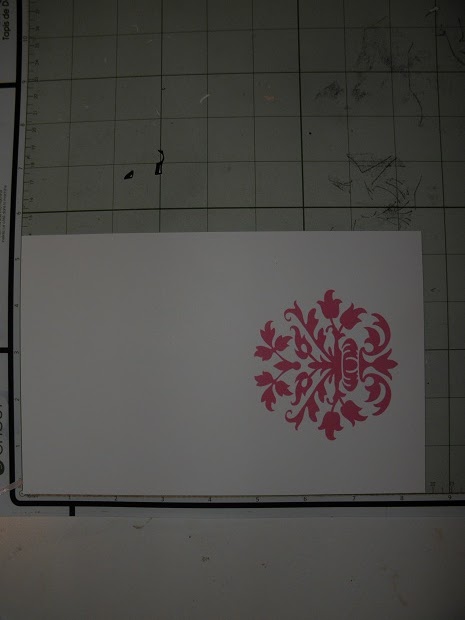
I started with an 8.5 x 5.5 piece of paper on my Imagine mat.  I placed in on the top left hand corner of the mat.  I took the picture correctly, but when I downloaded the image from my camera, it got rotated so the top of the mat is on the left of the pic.
I selected the image I wanted to print, sized to 3" high and then pressed next on my imagine.

I set my page size to 5.5 wide and 8.5 tall.

Here is what is looks like so far.  Since you can't manipulate the images on the Imagine mat like you can the Gypsy, Expression, etc.  I had to get my image down to the bottom of the paper and in the middle. When CCR(Cricut Craft Room) is finalized, you should be able to manipulate the images on the imagine mat, just like you can the Expression.

Pressing the back key I added plain squares from the standard images that come with the imagine.  the first square I sized to 3x3, and then I added 7 more squares sized to .5" tall.  I did not color these images, and these squares were added in front of the damask decor image I already added to my Q.  The above pic is what it looks like when I was done.  The image is right about where I want it.


I then selected my damask decor image and chose a color to flood fill it.  The sqaures I left colorless.  The Imagine will ignore these and just print the Damask Decor Image.


before you hit next after you have everything the way you want it, you need to select settings and chose print only, so the imagine will print but not cut.

Here is what it looked like after I printed it.  The top of the card is to the left.


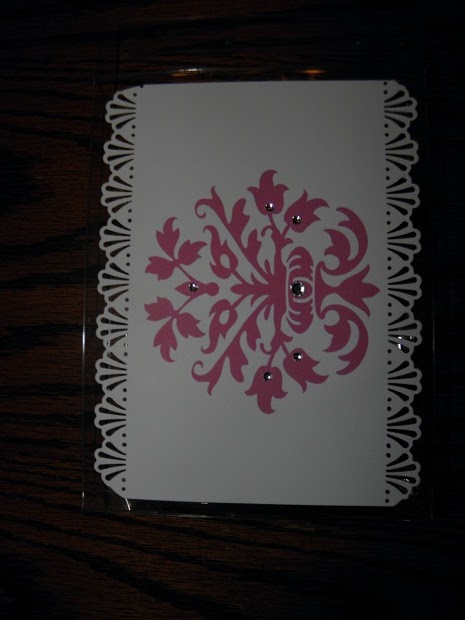
I trimmed one of the prints to be approx 4.25x5.25, punched the edges, added some bling, and adhered it to a clear plastic note card box I ordered off of Papertrey ink. 

Here is a sample of my finished note cards, they are 5.5 wide by 4.25 tall. I punched the corners, added bling and ribbon.


I put them all in the clear box.  Wouldn't these make a great gift for someone?  You can write or stamp any sentiment you want in them.
If you look through you carts, I bet you could find all kinds of images to use on these cards.  Who needs fancy stamps(even though I just love fancy stamps), when you have your Imagine.

Thanks Sheila for having me today on your blog.  I really have fun trying to come up with projects.

Until next time, Beth.

Sunday, February 27, 2011

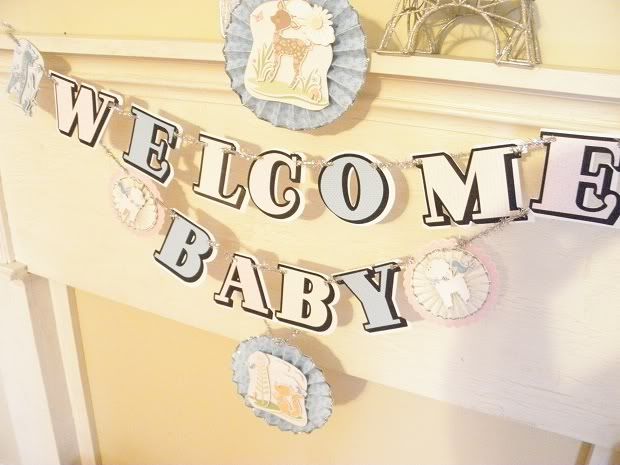
Welcome Baby!

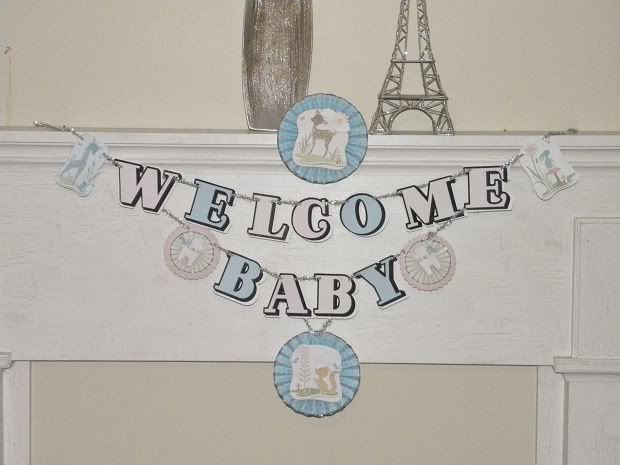
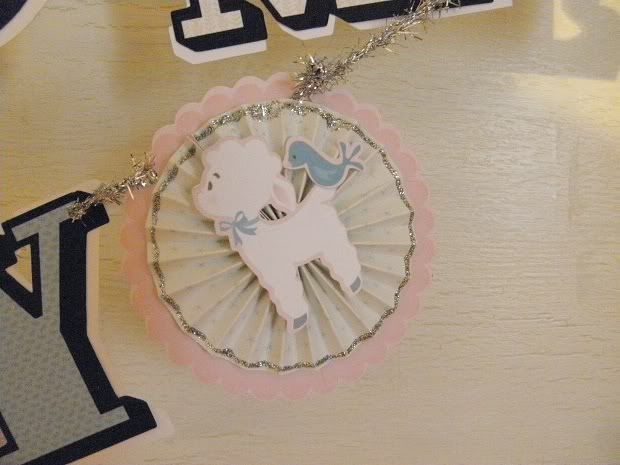
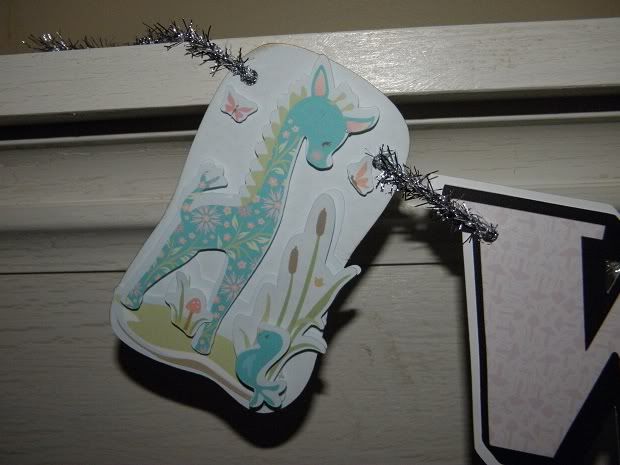
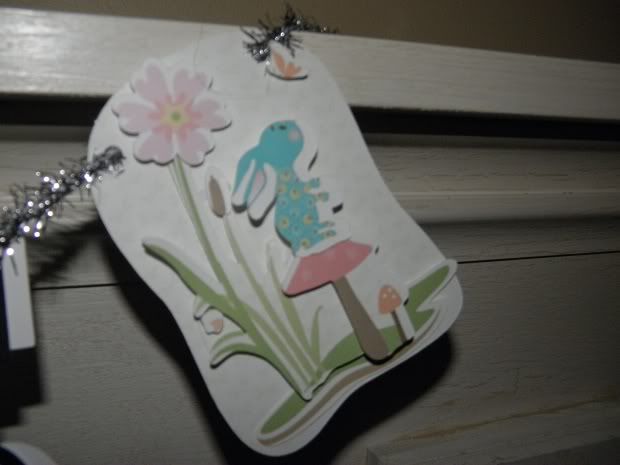
I wanted to share with you a banner I made for the Cricut Circle blog Monthly Challange for February.  The theme is Banners and I wanted to use my Imagine to make the project.  I also wanted to use Nursery Tails.  I don't know of anyone that is expecting in the family, but this is what I came up with. 

Carts, Nursery tails, Country Carnival. 

All Papers were either printed or cut with my Imagine.

I started by caching 3 patterns off of Nursery tails that I wanted to use on Country Carnival to print the letters.  I put in Country Carnival and Spelled Welcome Baby at 3" substituting the Nursery Tails Pattern for the original Courtry Carnvival pattern.  I also cut at 3.25" the same letters but I got rid of the pattern all together so the Imagine would cut only and not print.


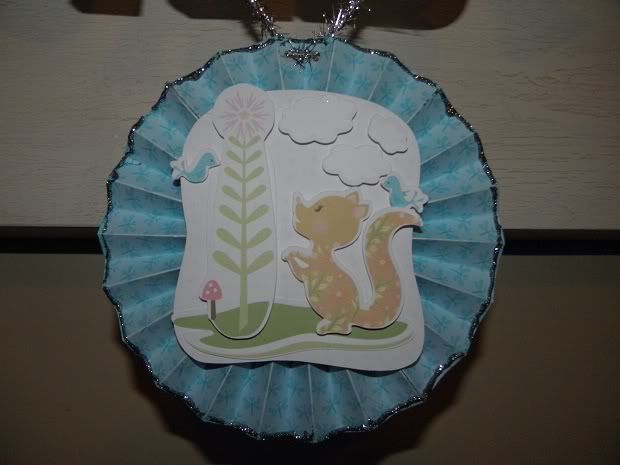
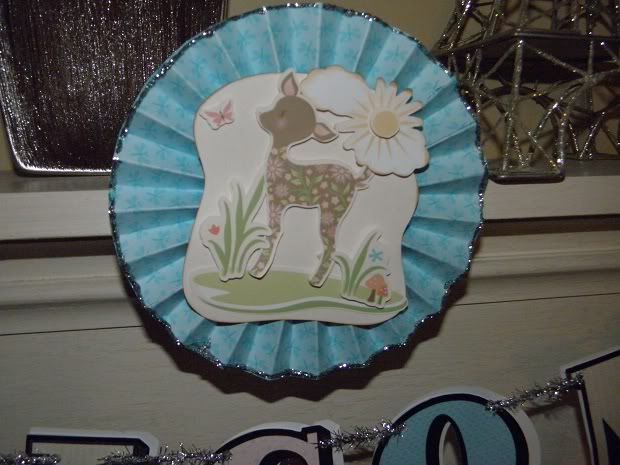
For the rosettes, I printed 1 12x12 in blue, cut 4 pieces 3x12, scored at .5" glued 2 together so I ended up with 2 3x12 long strips scored.  Glued the ends together and pressed into rosettes.  I stickled the edges with silver stickles.


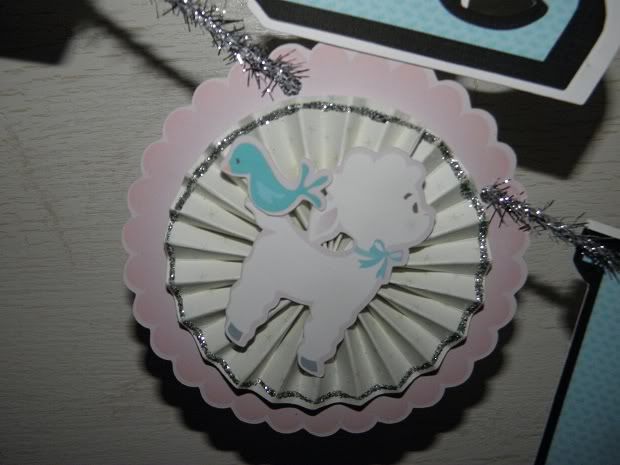
For the rosettes below, I cut 2 of the pink scallops from Nursery Tails deleting all of the other images that came with the scallops.  I cut the lamb by itself and printed more paper for the scored rosettes


I finally think I like my imagine, once in awhile it does nutty things, but for the most part, it does what it's supposed to.

Beth

Sunday, February 13, 2011

Day 2 of For The Love Everyone Blog Hop aka A Sea of Monkey's and Bunnies looking at you.

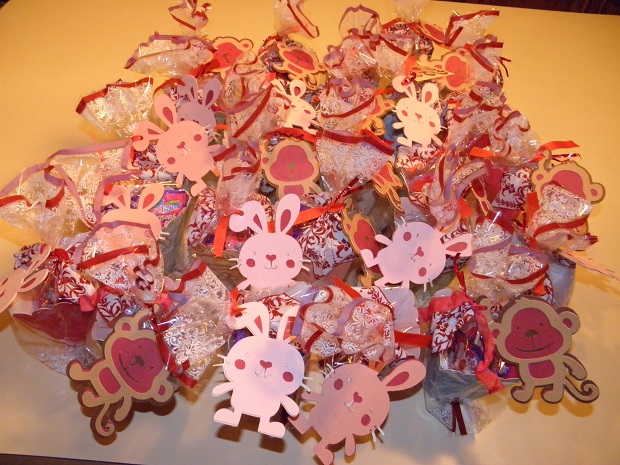
Hello Hello, Welcome back.  I hope everyone is enjoying the Hop.  My daughter had her Valentines party at school on Friday and I whipped up these little treat bags using my Cricut and Gypsy.  Ok "whipped" up is a little misleading because it took a good bit of time to cut and assemble everything.(actually about 2 1/2 hours.)


Recipe
Cricut
Tags Bags Boxes and More(TBBM) cart
Create A Critter(CAC) cart
Cardstock
I used my Gypsy, but you can make these without one.
Cellophane Treat Bags
Adhesive(I used my Xyron 5" sticker maker and it went pretty fast)
ribbon

I started with the treat boxes themselves and using TBBM, I sized them so I could get 2 on a sheet of 12x12 paper.  I cut 25 of these. I assembled, filled with candy and then tucked into the bags.


Using CAC, I cut the monkeys and the bunnies at 4.18" along with their layers and shadows and attached them with ribbon to the bags.  I love the little critters on this cart and plan on using more in the future.


While this Blog Hop is going on, I am at a Cricut Swarm in Michigan on Friday and Saturday, and I wanted to share with you my Valentines I made for exchanging at the Swarm.  I also wanted to show you the calling cards I made to pass out. 

The Valentine's were made using the Cricut to cut the cartstock with the scalloped heart cut into it.  I ran that piece through my cuttlebug.  I stamped the image on a folded card, colored with markers, and then pop dotted the scalloped heart piece over the top.  I then added paper flowers and bling.


The Calling Cards are 3x3 and made almost entirely using my Imagine, except for the W.


Well thanks for joining me on my first blog hop.  Don't forget about the blog candy, see post below for instructions on how to win a Nursery Rhymes cartridge and also the tote bag that Thirty One Gifts  has generously donated.

Here is a list of blogs participating this weekend, and also a next blog button to hop to Nana Donna's Blog.
She's A Sassy Lady 
Thunderbirdlindy by Design
Nana Donna's Card Dreams
Okielady's Scrap N'More_bug
MelissaMade 
Just Yolie, Just Create
Gaby Creates
Daily Grace Creations
The Cricut Diaries
The Cricut Couple


Wednesday, December 29, 2010

Circle Blog Weekly Challenge

Hi Everyone, I hope everyone had a wonderful and uneventful Christmas.  I was able to spend the whole day scrapping, something I never get to do.  It was awesome.  I even did a little shopping online, well maybe not a little.  I really must rein myself in.  This week alone, I sent in an order to Sizzix, Papercrafting Pro, and a2z scrapbooking.  We also went to WV over Christmas and on the way back, I talked DH into stopping at Archivers in Columbus.  I could spend hours in there.  So, today I got to play with some of my new toys.  I was working on the Tim Holtz 12 days of Christmas tags, when I suddenly realized, that the Weekly Circle Blog Challenge deadline was coming up, I thought tonight, and then I realized it was only Wednesday, and that I had until Thursday, AFTER I got the project done.  I started on it at 7 pm and finished at 11 with pics.  Here is my project:

I started with a 5.5 x 4.5 red tin that I painted with Pink acrylic paint.
I used my Cricut Imagine and the following carts:
Blossom(Pink Background Paper)
Better Together(Child, Dog, Fox, Bunny, BackGround, Houses)
Nursery Tails(trees)
Hopscotch(Cloud Background Paper)
I added a porcelain knob at the top, and ribbon around the top edge.

Wednesday, October 27, 2010

Today I am a guest designer on She's a Sassy Lady

CUT FILE IS AVAILABLE UNDER CUT FILE TAB, ENTITLED PRESENT ALBUM


Hi again everyone, today is my day to be a guest designer on shesasassylady.  This month I am going to give you a peek at Snow Angel.  It's a patterns and shapes cartridge for the Imagine.  I am in love with this cart.  The papers and layers you can create are awesome!

This project is a mini album.  I am really happy with how it turned out.  Using my Gypsy, I started with the present from Create a Critter, and then added squares inside of it from George.  I also added a spline from George and 3 ovals from George for the binding holes.  I cut this 2x out of Fed Ex envelopes, and also 2x out of card stock.  I then flipped the image and cut 2 addnl times out of cardstock.  I ended up with 6 cuts for both the front and back covers(4 cardstock and 2 fed ex).
I took a square from George sized to 5x5.5, added the spline and the ovals to created the pages.  I just cut these out of cardstock, 8x.
To decorate the pages, I pulled out my Imagine.  I really wasn't that impressed with this machine at first, but the more I use it, the more I am thinking "WOW".  It has so much potential.  The little house below is printed and cut all in one layer at 3.5".

The Background pages below and the tag and snowman are all printed and cut from the Imagine.


Here is a close up of the snowman, he was cut in layers and pop dotted together for a 3d effect.

Here are some addnl pages.


The Pics don't do this album justice, the colors are bolder and more vivid in real life.  These pics were taken late at night(as usual).  This album is ready to go for Christmas.  I am thinking black and white photos for an old timey feel.

Here is a picture of the finished album.

I hope you like it.  I want to thank Sheila for having me as a guest designer on her blog.  I will try and add the cut file by tonight.  You just need create a critter and george.
Thanks again, Beth