Showing posts with label Gypsy Files. Show all posts

Friday, November 12, 2010

Chinese Take Out a la Gypsy

Hi everyone, today is my day to be a guest designer on The Bug Bytes.  I wanted to share with you some Chinese take out boxes I created on my Gypsy using Opposites Attract and George Basic Shapes.  I had a major problem finding a trapezoid on the Gypsy that was symetrical.  I finally came up with one on Opposites attract, but even that one was kind of off kilter, but I went with it anyway.  This file is not perfect, but it turned out ok for what I wanted.  I had messed with the file numerous times before I scrapped the whole thing(no pun intened) and started over.  At that point I was running out of time so I went with what I had.
The first picture is on the file itself, sans Christmas tree cut, I added that later.  If you look closely, you can tell the image is not perfectly symetrical.


At this point I thought it would be cute with a window in it, so I added the Christmas tree from one of the Christmas carts.
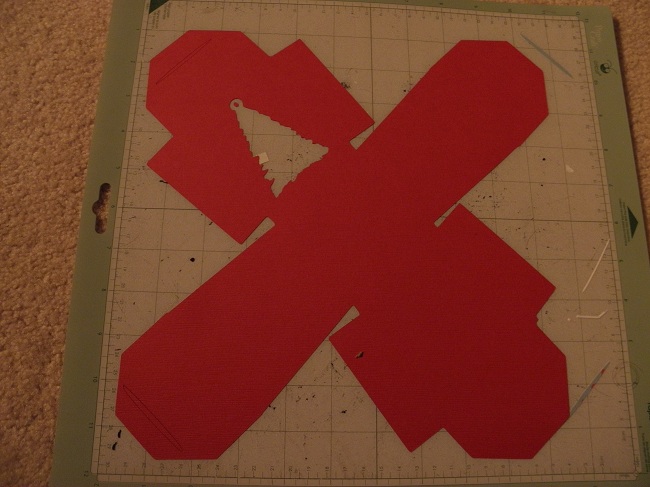


I did not add score lines to the file itself, but did them by hand afterwards.  Did I mention this cut is not symetrical, and because of this, I just had to eyeball the score lines..

I tried to make sure I scored from the bottom corner of the box to where the top folded down 3.25" on all 4 sides so when the box went together, the top edges were even.
 I took 12" of 2 different colored ribbon and some heavy weight thread and a needle and with a gathering stitch sewed the 2 ribbons together by hand and gathered them to form a rosette.  Since I was only doing one, I didn't get out the sewing machine.

I really love these rosettes, they are so easy, and add so much to a project.

I had 3 prototypes before I settled on the last design but I thought I would decorate and throw them in to the post also.  They don't look bad, especially after being decorated up.
Here is a pic of all of my boxes, they would look great with 25 cut out and used a count down to Christmas Calendar maybe strung on a string in front of a window..  The first 3 are the prototypes(can you tell my husband is an engineer?)  The last one with the tree is the final one.


Close ups, I added a piece of Cricut Cart Plastic to the inside of the tree cut so my goodies would not fall out.  I have purchased so many carts, I don't think I will every run out of plastic.


Well thanks for visiting today, you are the reason I do this!  If you are interested in the cut file, email me (rwhite58@maplenetbroadband.com) and I will post on my blog.  I didn't want to just put it out there with it not being perfect.

Until next time, keep crafting, Beth.
Thursday, September 30, 2010

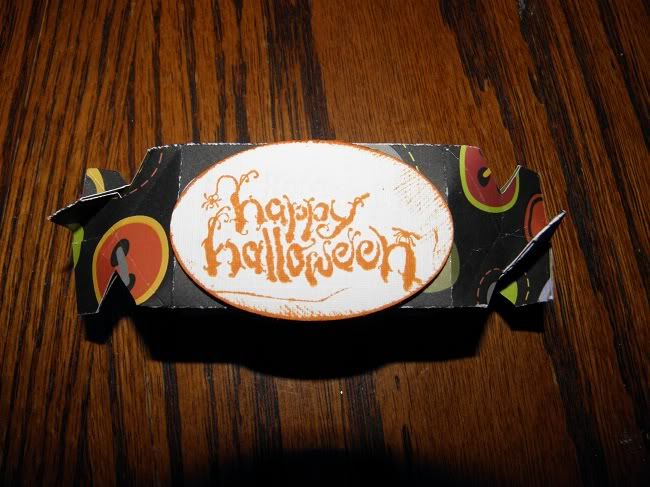
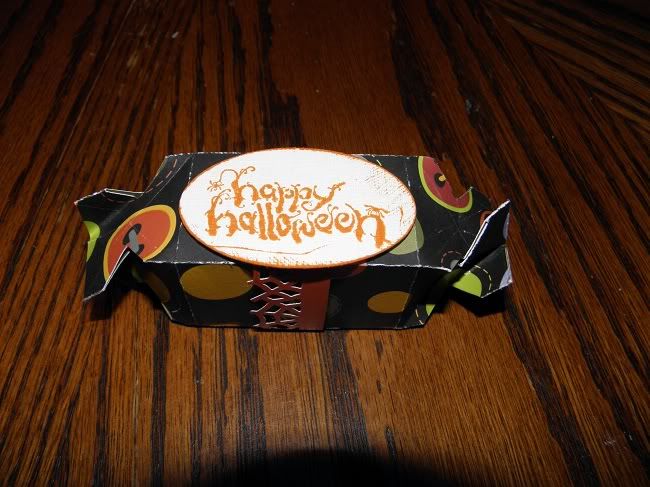
Gypsy File created Sweet Treats with George


I created this the past couple of days to mimic the sizzix die for the candy box.  It is relatively small, 1.38x2.  It took me awhile to get it right, but I am pretty happy the way it turned out.  You can download it under my cut file tab, Sweet Treat.  The first tab is cut, the second tab is score.  I put my blade upside down in my cricut to score.  You should be able to cut using the regular cricut.  Be very careful you don't move the images around in the file, they were a bear to line up.

Sorry the pics aren't the best, but you can cut and decorate anyway you like.  This was just me being in a hurry.

Feel free to leave me some blog love it you like this file.


Beth

Wednesday, September 22, 2010

I am a Guest Designer on She's a Sassy Lady today! NOTE, FILE HAS BEEN ADDED ABOVE!

Hi everyone, today is my day to be the guest designer on She's a Sassy Lady.  It seems like just yesterday I was a guest designer.
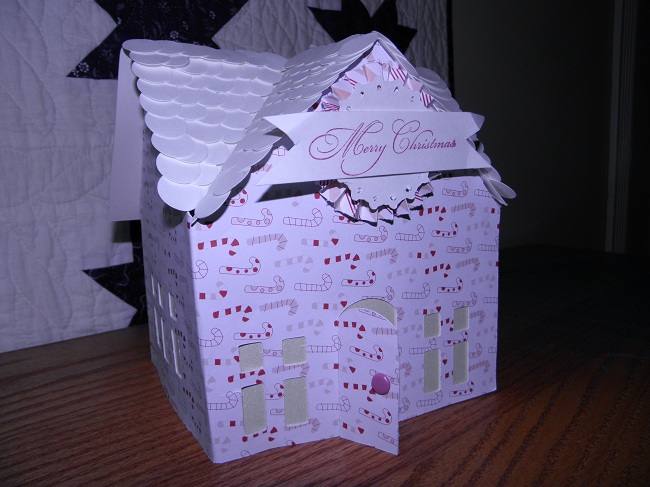
Today I want to share with you a 3-d house made with my favorite cart, George.  Some of you might recognize the project out of the SU mini catalog.  I thought it was an awesome project, and I thought it would be perfect for my post today, so I hurried up last night and recreated the house using my Gypsy and George.  Here is the finished project,


I really love making 3-D projects from George for all of you readers that don't have some of the other carts.

Supplies needed are Gypsy or DS
George
2 Sheets Poster board
12x24 mat
2 sheets of cardstock color of choice
score board
5/8" circle punch
Red Ink
Sentiment of choice

I started by cutting out the house images from the poster board.


The first tab is the cut tab in the file, and the second tab is the score tab.  I did not unload my mat prior to scoring with the 2nd tab.  I just turned my blade upside down, and "cut" page 2.  I then unloaded the mat and I had my score marks already in place. 

I then loaded 2 pieces of 12x12 cardstock on my mat, both pieces being the same pattern, turned my blade right side down, cut, turned my blade dull side up and scored again, do not unload mat in between these steps.

I attached the printed cardstock to my poster board.


Then assemble the house.


The roof tab in the file needs some work, so I had to tweek it to get it to fit the house.


Attach the roof to the house.  Take your 5/8" circle punch and start punching circles out of the excess posterboard.  I am sure you are asking why I didn't use my cricut, and I thought it would be a lot faster with the hole punch, but you could use your cricut.

I punched a whole lot of circles, 4x as many as in the pic.


I then glued them to the top of the roof in a "shingle" type arrangement.

Stamp sentiment in red ink on the poster board and cut out in a banner shape.

I took a 12x1" piece of coordinating cardstock and scored it every 1/4" on my score board. Then I glued the ends together to form a circle.

I also cut some scallops from my cricut, but I didn't use George. 

I attached all of this to the front of the house. I cut some rectangle piece of cardstock and glued them inside the windows.

I was in a bit of a hurry to finish so I did not get to decorate to it's full potential.  This house would look great with tissue paper glued inside and then a small light placed on the inside of the house.  It would also look cute decorated for Fall, any season really.  Just think of the possibilities, and all you need is George.

As soon as I get the file the way I want it so you want have too much trouble making this project, I will post for everyone.  Hopefully by the weekend.


Thanks everyone for joining me today, and thanks Sheila, you are a great blogger and friend.
Beth

Wednesday, September 15, 2010

Purse/Gift Bag


Hi everyone, today I am a guest designer on  The Bug Bytes.  This is my first time posting on the Bug Bytes, and to say the least I am very excited.  A big shout out to Pam for allowing my to design for her blog.  Thanks Pam, sorry I missed posting the first time.  My project for today is another purse made entirely from George and my Gypsy.  I am going to warn everyone this is pic heavy.

I started by creating the file in my Gypsy.
Then I chose 3 different colors of card stock, one for the purse, 1 for the out side of purse, and 1 for the handles.


I cut out all images.


This piece was cut as one and then I cut it in two pieces and attached one to each side of the purse.


I also cut the handles and attached, see pic above.
Then I scored the purse.


The side pieces were cut from the cricut and then cut in two pieces.
These were scored also.
I glued the sides to the bottom. 


Before I glued the sides to the purse, I took ribbon and pleated it.  I made enough pleated ribbon for across the front of the purse, and the purse straps.


Sew it across the front of the purse


I glued the sides to the front and back of the purse.
I attached the straps to the handles using hot glue and then attached buttons.

I cut 3 flower sets from the cricut but only used 2 gluing them to the front of the purse.


Here is the completed Purse again.

Thanks for sharing this project with me.  I have the gypsy file available under Cut file tab.

Once again thanks Pam,

Beth.

Wednesday, April 28, 2010

Flower album created for Shesasassylady Blog


I was asked to be a guest designer on Shesasassylady blog several month's ago, and this is what I came up with for my first post.  Thank you Sheila for letting me guest design(I love being a Sassy Lady!).  It is such an honor, and I am very excited about it. 

The inspiration for this project came one day when I was looking thru dies on a webpage that had a lot of amazing dies, that were quite pricey.  I saw a petal album die that I decided to create my own using my Cricut, Gypsy, George cart, and Hannah Montanna cart.  I really like this album because it had one petal on every page for a total of six pages.  In order to get the petals of the album just right, I needed to get just the right heart shape.  Using my Gypsy, I looked thru all of the hearts available on the cartridges and decided that a heart on the Hannah Montana cart would be perfect.


I created a circle using George and sized it to apprx 5" then I added the heart from the HM cart at 2.52x2.43 on the left hand side of the circle and welded it.  From this I created the other 5 pages, using the group and copy feature available on the Gypsy. The first page had one heart on it, but the other pages had 2 hearts, one for the spine and one for the petal.


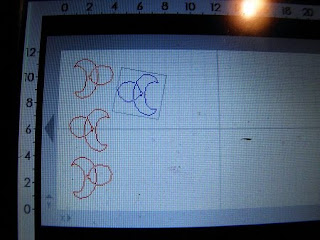
The above pic is only one page in my Gypsy.  It took 2 pages to get the whole album.  I offset the petal on each page so when I was done, I had an album with six petals.  I cut the base out of fed ex envelopes that I get used at work.  I only cut from fed ex material each page once.  For the cardstock I cut one page printed side up, and one page printed side down so I have a cut for the front and the back of each page.  I attached the cardstock to the fed ex album using zip dry glue(love this stuff.)  Front page to front page, back side to back side.  Below is the album before I emblished it.


I wasn't happy with my choice of cardstock, so I recut and attached new cardstock over the album again.


I cut the emblishments for the pages using Song Bird and Picturesque.  I cut the petals by themselves and attached over the petals that were already there.I created circle frames by taking the original circle I created with George, copying it, placing it directly over the circle I copied from and making the second circle smaller on the Gypsy, this created frame that fit perfectly. I attached the frames, but left the top side open so when I get my garden pictures, I can slide them under the frame and emblishments on the page.


Here is the finished album.


I hope you enjoy this project, and as a special treat, the Gypsy file is available under the cut file tab at the top.  You will only need George and Hannah Montana to cut the album out, and you can emblish it anyway you want.  If you have questions, let me know.

Beth

Thursday, March 25, 2010

Purse Card Cut file made entirely with George.


Wouldn't this card be perfect for the Girly Girl in your life? Either for Graduation, Shower, or Birthday?
I created this purse similar to the one below, using my Gypsy and my Cricut. The finished size of this purse is approx 4x8. I started out with a 12x12 piece of cardstock and loaded unto my mat FACE DOWN. On the cut file there are 3 pages, the first page is the actual cut page, the second page is the score page, and the third page is the flower cut. "Cut" page 2 first. Put the cricut blade upside down in the blade housing to create score marks on the purse. These score marks are for reference only, you will have to rescore after the purse in done.


After page 2 is done either return to design on the Gypsy, and cut page one, or cut page one with CDS. Do not unload your mat no matter which file you use. Page 1 cut will create the actual purse. Don't forget to turn your blade over so the knife side is down before you cut page 1. When page one is done unload mat and remove purse and remaining cardstock.

Load paper for your flower and cut page 3.

I punched the flap border by hand with a fiskars border punch.

After your are done adding the border, go over the score lines again and fold accordingly. You will have a fold at 4"in the middle of the card not including the flap, a fold at 4" from the fold you just made, a fold 1/4" from the last fold. this creates the spine of the purse.

In the 1/4 spine punch 2 holes equal distance from the edge of the card to thread the purse strap thru. Thread strap of your choice thru holes and secure. You can use ribbon, cord, or pearls like I did. Add velcro to the flap to hold purse closed.


I have created a nifty little insert for the purse. This insert can hold your sentiment and a gift card.

Start by taking a piece of double side thin cardstock cut to 7.5x7.5. I used pearl vellum that I got from Micheal's. Fold vellum in half, diagonally corner to corner, and then diagonally again corner to corner so you end up with a piece like the pic below.


You will have to score the next folds. At each of the 4 corners at 1 1/2" in from the edge, score the following lines. Do this on all 4 corners.

Next fold the vellum so when you are done it looks like this, with the corners tucked into the pocket.

Finally open the card and glue the insert to the back of the card centering it inside, and then apply the glue to the front of the insert and close card so the glue attaches to the front of the card.

Take the 3 flowers you cut and with a bone folder turn of the petals with the same technique you use to make curling ribbon. Glue together, add bling and glue to the front of you card.